If you’re looking to create your own custom enamel pins or badges, you’re in the right place! Enamel pins are popular items, whether for personal use, promotional giveaways, or even for selling online. Designing custom pins can be fun, but it’s important to follow a few simple steps to make sure your design stands out. Here’s a step-by-step guide on how to create custom enamel pins that are both stylish and professional.
1. Start with an Idea
Before you dive into design software, it’s crucial to have a clear idea of what you want. Custom enamel pins can represent anything from logos, slogans, characters, or simple designs. Take inspiration from your hobbies, favorite quotes, or even popular trends. The possibilities are endless!
2. Choose the Pin Style
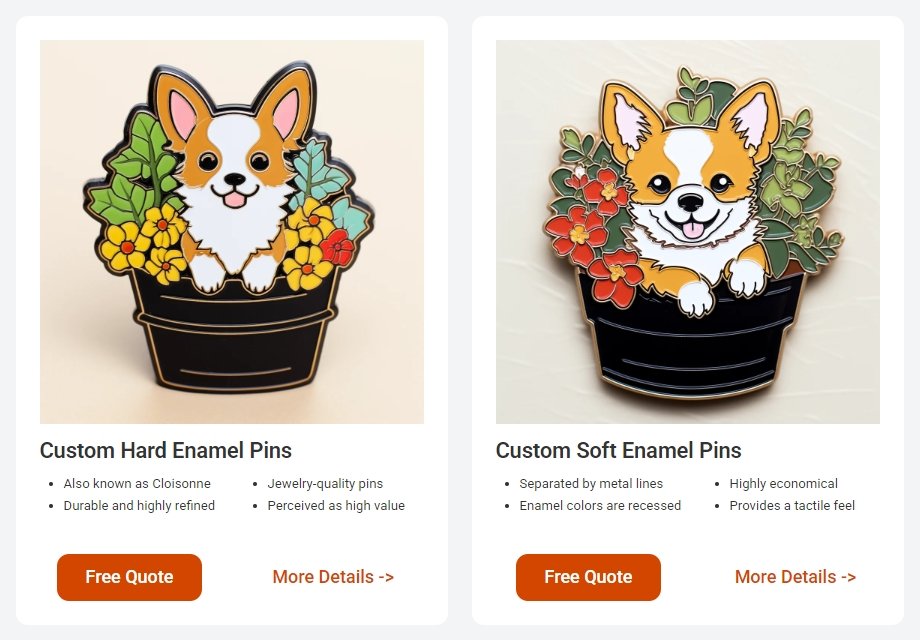
Enamel pins come in two main types: soft enamel and hard enamel. Soft enamel has raised and recessed areas, giving it a textured look. Hard enamel is smooth and polished, with a more refined finish. Decide which style fits your design better. Soft enamel pins are perfect for vibrant, colorful designs, while hard enamel pins are ideal for clean, professional looks.
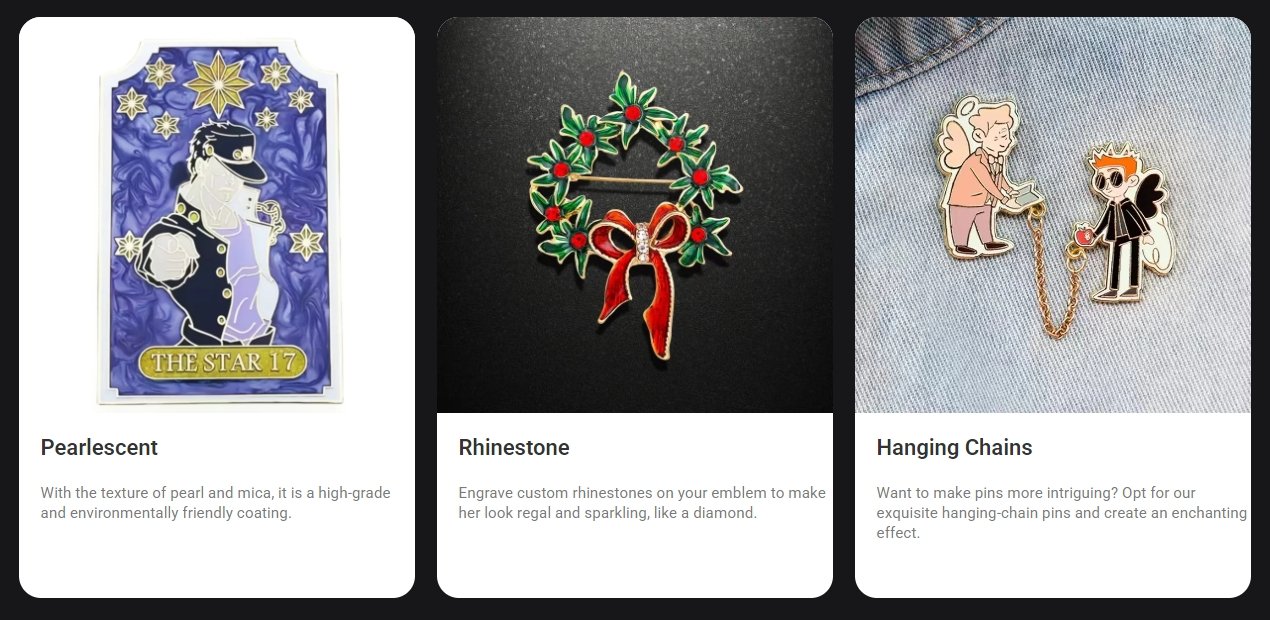
Select Your Plating or Finish
There are more than 16 pins plating or finish you can select. Shiny Gold, Silver, Copper, Black Nickel. Rose Gold. Antique gold, silver, brass, copper. rainbow, dye black, blue, green, red. two tone finish etc.

Pick Your Colors
Choosing the right color palette is key to a successful pin design. Think about the message you want to convey and the audience you’re targeting. Bright and bold colors work well for fun and casual designs, while neutral colors are often better for corporate or minimalist styles. Keep in mind that enamel pins are usually made with a limited number of colors, so try to keep it simple and striking.


3. Sketch Your Design
Once you have your idea and colors in mind, it’s time to sketch your design. If you have a reliable pin manufacturer like Customblitz.com, they can offer you free artwork design. You don’t need to be a professional artist—just draw a basic outline of your pin. If you’re unsure, sketch on paper first or use a free digital drawing tool. Don’t forget to include important details like text or borders, as they will be important in the next steps.
Use Design Software
Now, it’s time to bring your design to life! Use design software like Adobe Illustrator or free tools like Inkscape Midjourney Chatgpt or Canva. Make sure your design is vector-based, meaning it can be resized without losing quality. Most pin manufacturers need a high-resolution design in vector format, so this step is crucial.
Prepare Your Artwork
Once your design is finalized, make sure it’s ready for production. Convert your file into the proper format (usually .ai, .eps, or .pdf). Double-check for any errors, such as colors bleeding into each other or tiny details that may not show up clearly on a small pin.
4. Select a Pin Manufacturer
When your design is ready, choose a reliable pin manufacturer like CustomBlitz! Make sure they offer customization options that match your vision, whether it’s size, shape, or finish. Also, confirm the quality of the materials used and their production process. Customblitz also provide Free artwork design, Free shipping and No mim order custom enamel pins and badges.

Review a Sample
Before committing to a full order, ask for a sample of your enamel pin. This will allow you to see how your design looks in real life. You can check the details, colors, and overall quality. If you’re happy with the sample, you can proceed to place your order.
Order and Enjoy!
After confirming your design, it’s time to place the order. Once your pins are delivered, you can start sharing them with the world. Wear them, sell them, or give them as gifts—the possibilities are endless.